

As a supplier of bus brake pads, I understand the critical importance of maintaining these essential components for the safety and performance of buses. Cleaning bus brake pads is a task that should not be overlooked, as it can significantly extend their lifespan and ensure optimal braking efficiency. In this blog post, I'll share some detailed steps and tips on how to clean bus brake pads effectively.
Why Clean Bus Brake Pads?
Before diving into the cleaning process, it's essential to understand why cleaning brake pads is necessary. Over time, brake pads accumulate dirt, dust, debris, and brake dust. This buildup can reduce the friction between the brake pads and the brake rotors, leading to decreased braking performance. Additionally, contaminants can cause uneven wear on the brake pads, which may result in noisy braking, vibrations, and even premature failure. By regularly cleaning the brake pads, you can prevent these issues and keep your buses operating safely.
Tools and Materials You'll Need
- Brake cleaner: A high - quality brake cleaner is essential for removing dirt, grease, and brake dust. Make sure to choose a cleaner that is safe for use on brake components.
- Wire brush: A stiff wire brush will help you remove stubborn debris from the brake pads and calipers.
- Compressed air: Compressed air can be used to blow out any loose dirt and dust from hard - to - reach areas.
- Safety equipment: Wear safety glasses, gloves, and a respirator to protect yourself from brake dust, which can be harmful if inhaled.
Step - by - Step Cleaning Process
Step 1: Prepare the Bus
First, park the bus on a level surface and engage the parking brake. If possible, chock the wheels to prevent the bus from rolling. Make sure the engine is off and the key is removed from the ignition. This will ensure your safety during the cleaning process.
Step 2: Remove the Wheels
Using a lug wrench, loosen the lug nuts on the wheel you want to clean the brake pads for. Then, use a jack to lift the bus until the wheel is off the ground. Remove the lug nuts completely and take off the wheel. Place the wheel in a safe location.
Step 3: Inspect the Brake Components
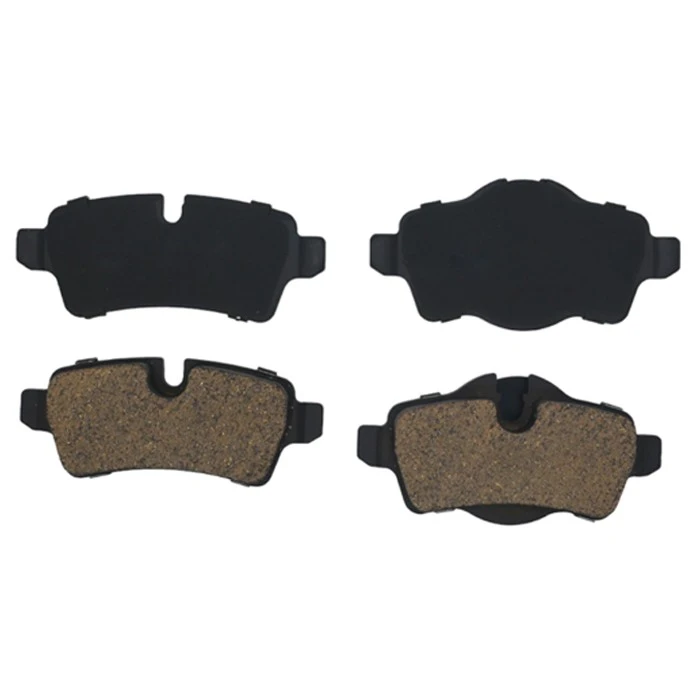
Before cleaning, take a close look at the brake pads, calipers, and rotors. Check for signs of excessive wear, damage, or unevenness. If you notice any issues, such as cracks in the brake pads or scoring on the rotors, it may be necessary to replace these components. You can find a wide range of high - quality brake pads on our website, including Silent Stop Ceramic Brake Pads, Yellow Brake Pads, and Metallic Brake Pads.

Step 4: Clean the Brake Pads
Spray the brake cleaner generously onto the brake pads. Make sure to cover both the friction surface and the edges of the pads. Let the cleaner sit for a few minutes to break down the dirt and grease. Then, use a wire brush to gently scrub the brake pads. Be careful not to damage the friction surface. Pay special attention to the areas where dirt and debris tend to accumulate, such as the grooves and holes in the pads.
Step 5: Clean the Calipers
The calipers also need to be cleaned to ensure proper operation. Spray the brake cleaner onto the calipers and use the wire brush to remove any dirt and rust. Focus on the piston area and the brake pad guides. Compressed air can be used to blow out any remaining debris from the caliper.
Step 6: Clean the Rotors
While the brake pads are being cleaned, it's a good idea to clean the rotors as well. Spray the brake cleaner onto the rotors and use a clean cloth to wipe them down. This will remove any surface contaminants and help improve the contact between the brake pads and the rotors.
Step 7: Reassemble the Components
Once the brake pads, calipers, and rotors are clean and dry, it's time to reassemble the components. Place the wheel back on the hub and hand - tighten the lug nuts. Lower the bus using the jack until the wheel is on the ground. Then, use the lug wrench to tighten the lug nuts to the manufacturer's recommended torque specification.
Tips for Effective Cleaning
- Regular cleaning: Make cleaning the brake pads a part of your regular maintenance schedule. Depending on the usage of the bus, it's recommended to clean the brake pads every 10,000 - 15,000 miles.
- Proper ventilation: Always clean the brake pads in a well - ventilated area to avoid inhaling brake dust.
- Avoid over - cleaning: While cleaning is important, be careful not to over - scrub the brake pads, as this can damage the friction material.
Conclusion
Cleaning bus brake pads is a relatively simple yet crucial maintenance task that can have a significant impact on the safety and performance of your buses. By following the steps outlined in this blog post, you can ensure that your brake pads are in top condition and provide reliable braking when needed.
As a leading supplier of bus brake pads, we are committed to providing high - quality products and valuable information to our customers. If you have any questions about cleaning your brake pads or are interested in purchasing our brake pads, please feel free to contact us for procurement discussions. We look forward to serving you and helping you keep your buses running safely.
References
- Brake System Maintenance Manuals from major bus manufacturers
- Industry standards and best practices for brake pad maintenance